Welcome to GrainLab
GrainLab is built for analog photographers who want to bring order to their craft. Whether you're juggling a shelf full of cameras, tracking a dozen rolls in various stages of development, or building a gallery of scans — GrainLab keeps everything in one place.
What you can do with GrainLab
- Manage your gear — Catalog every camera, lens, chemical, and accessory with full specs and storage locations.
- Track film roll lifecycles — Follow every roll through five stages, from fresh out of the box to archived after development.
- Organize photos — Upload your scans, link them to the gear and film they were shot on, and add technical metadata.
- Plan and track projects — Group photos into a project with a concept, a deadline, and a visual stage tracker.
- Map your storage — Build a nested hierarchy of locations so you always know where everything lives.
Where to start
If you're new, head to Getting Started for a step-by-step walkthrough of your first session.
Getting Started
Creating your account
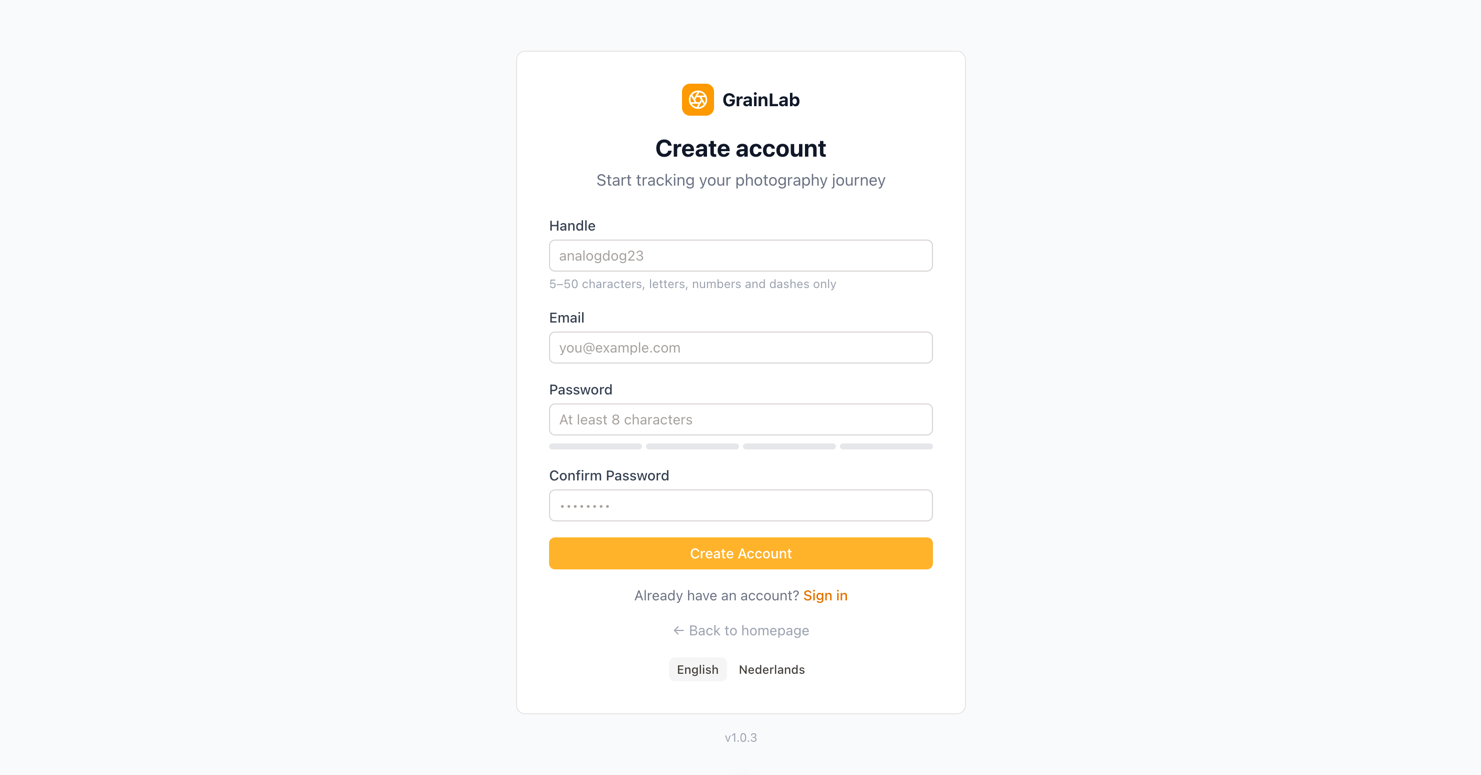
Head to the GrainLab homepage and click Get started. You'll be asked for:
- Handle — Your unique username (5–50 characters, letters, numbers, and dashes). This cannot be changed later.
- Email — Used for account management.
- Password — At least 8 characters with a mix of uppercase, lowercase, numbers, and special characters.
Once you submit the form, GrainLab sends a verification email to the address you provided. Click the link in that email to activate your account and log in. The link expires after 24 hours — if it expires, visit the verification page to request a new one.
Forgot your password?
On the login page, click Forgot your password? and enter your email address. GrainLab will send you a password reset link. Click the link in the email to set a new password. Reset links are single-use and expire after a short time — if yours has expired, just request a new one from the login page.
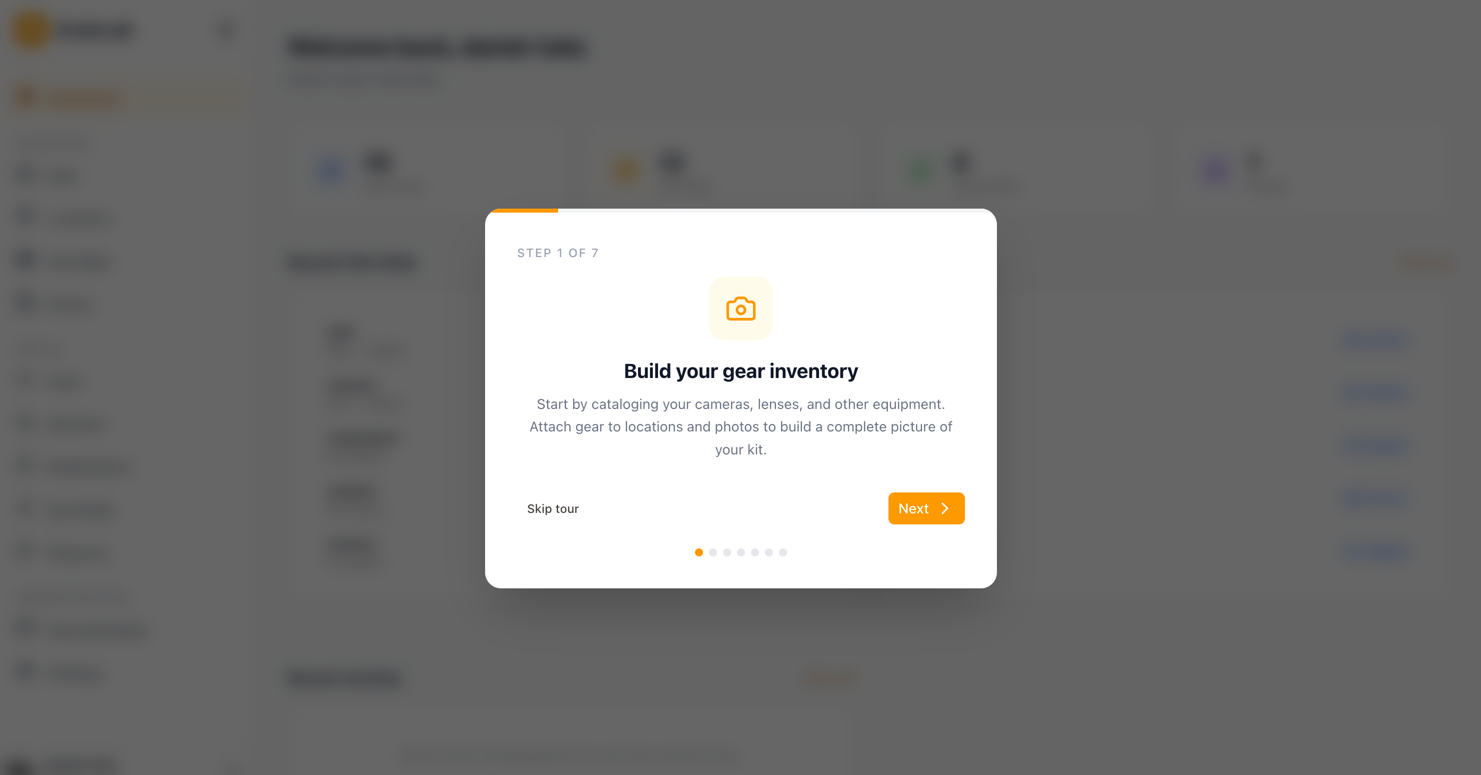
The onboarding tour
After registering, GrainLab walks you through a quick 7-step tour to help you find your feet:
- Build your equipment inventory — Add your first camera, lens, or other item.
- Organize with locations — Create a storage location like "Camera Bag" or "Shelf".
- Upload your photos — Add scans from a recent roll.
- Track your film rolls — Add a fresh roll and step it through the stages.
You can skip the tour at any time and come back to any section from the sidebar.
What to do first
The most natural starting point is:
- Add your equipment — Go to Equipment and add at least one camera. This unlocks the ability to load film rolls.
- Add a location — Go to Locations and create a root location (e.g. "Camera Bag"). You can assign gear and film rolls to it.
- Add a film roll — Go to Film Rolls and create a fresh roll. When you're ready, advance it to Loaded and select the camera it's in.
From there you can upload photos and start building your library.
Managing Your Equipment
Equipment types
GrainLab supports the following equipment types:
Cameras & Lenses
- Camera — Includes an analog/digital toggle. Only analog cameras can have film rolls loaded into them.
- Lens — Tracks focal length (prime or zoom range), minimum and maximum aperture, and mount system.
Optics & Accessories
- Filter — UV, ND, polarizer, color, graduated, infrared, close-up, star, and diffusion filters. Tracks diameter and, for ND filters, the number of stops.
- Adapter — Mount adapters that connect lenses to bodies with a different mount. Tracks from/to mounts, AF support, and whether it has electronic contacts.
Exposure & Support
- Light Meter — Handheld exposure meters. Tracks metering mode (incident, reflective, spot, or combination) and flash metering support.
- Flash — Speedlights, studio strobes, ring flashes, and on-camera flashes. Tracks guide number and TTL support.
- Cable Release — Mechanical or electronic shutter releases for long exposures.
- Tripod — Tracks maximum height, material, head type, and maximum load.
Film Handling
- Film Back — Interchangeable film backs for medium and large format cameras. Tracks the format (6×4.5, 6×6, 6×7, 6×9, or 4×5).
- Changing Bag — Lightproof bags for loading and unloading film in daylight.
Darkroom
- Chemical — Tracks developer/fixer type (B&W or C-41), expiry date, and development time settings. You can configure a base development time, a time increment per additional roll developed (e.g. +15 seconds per roll), and an optional maximum cap. GrainLab uses these to calculate and display a suggested dev time on both the chemical card and detail page, automatically adjusted for how many rolls you've already processed with that chemical. A warning appears when the suggested time has reached the configured maximum.
- Development Tank — Tracks capacity (number of rolls) and format support.
- Enlarger — Tracks the maximum film format the enlarger supports.
- Photographic Paper — Tracks paper type (RC or fiber-based), surface finish, and contrast grade.
- Printer — Inkjet, dye-sublimation, laser, or darkroom contact printers. Tracks printer type, maximum print width, maximum DPI, ink type, number of ink colours, connectivity, and whether roll paper is supported.
Scanning
- Scanner — Film and flatbed scanners. Tracks scanner type, maximum DPI, and format support.
Other — For anything not covered above.
Adding an item
Click Add Equipment on the Equipment page. The form asks for:
- Name — A friendly label (e.g. "Nikon F3 HP").
- Type — Select the type that fits your item. The form adjusts to show the fields relevant to that type.
- Brand and Model — For easy searching and display.
- Year — The manufacturing year (optional but handy for vintage gear).
- Serial number — Optional, but useful for insurance or resale.
- Location — Assign the item to a storage location you've already created.
- Notes — Free-text field for anything else worth remembering.
The form adjusts based on the selected type to show only the relevant fields — focal length and mount for lenses, filter type and diameter for filters, from/to mount for adapters, and so on.
Assigning a storage location
Every gear item can be assigned to a location. Once assigned, it appears under that location in the Locations tree, making it easy to find things when you're packing a bag or searching for a specific camera.
You can change the location at any time by editing the item.
Viewing a gear item
Click any gear card to open the detail page. You'll see all the item's specs, its assigned location, and a gallery of photos that were shot with it. This makes it easy to see which camera or lens produced which results.
Searching and filtering
Use the search bar at the top of the Equipment page to filter by name. The tabs across the top filter by type: All, Cameras, Lenses, Chemicals, and Other (which includes all remaining types such as filters, adapters, tripods, scanners, and darkroom equipment).
Film Roll Lifecycle
The five stages
Every film roll in GrainLab moves through five stages:
- Fresh — Just purchased, sitting in your fridge or bag.
- Loaded — In a camera and actively being shot.
- Ready to Develop — Finished shooting, waiting to go into the darkroom or off to a lab.
- Developed — The roll has been processed; you may have scans.
- Archived — Done. Stored away for the long term.
You advance a roll forward (or step it back) using the stage tracker on the film roll's detail page.
Loading a roll
When you advance a roll to Loaded, GrainLab asks which camera it's going in. Only cameras marked as analog appear in the list. Only one roll can be loaded per camera at a time — if you try to load a second roll into the same camera, GrainLab will tell you which roll is already there.
You can also skip the camera selection if you want to record the loaded stage without linking it to a specific body.
When advancing to Ready to Develop, GrainLab optionally asks you to assign a storage location for the roll while it waits for processing.
Development notes
You can add general notes to a film roll at any time — when creating it, editing it, or at any stage. When advancing a roll to Developed, you can additionally log full development details:
- Developer — The chemical used (e.g. Kodak D-76, Ilford ID-11).
- Time — Development time in minutes and seconds. If you select a chemical that has development time settings configured, GrainLab will automatically suggest a time based on how many rolls you've previously developed with that chemical. The suggestion takes into account any per-roll time increment you've set on the chemical, up to the configured maximum.
- Temperature — In °C or °F (controlled by your preference in Settings).
- Push/Pull stops — Positive for push, negative for pull.
These details are visible on the roll's detail page and help you build a record of what works.
Camera snapshot
When you load a roll into a camera, GrainLab records a snapshot of that camera's details (name, brand, model, year, and serial number) directly on the film roll. This snapshot is permanent — if you later rename the camera, delete it, or the roll advances past the loaded stage, the Camera Used card on the roll's detail page still shows exactly which camera shot the roll. This gives you a reliable record of what was in your hands when you made those exposures.
If you loaded the roll without selecting a camera, no snapshot is saved and the Camera Used card is not shown.
Archive sheet
When you advance a roll to Archived, GrainLab optionally lets you record where the roll lives in your physical archive. You can fill in:
- Subject — A label for what's on the roll (e.g. "Summer 2024 portraits").
- Date — The date you archived it.
- Sheet number — The sheet number in your binder or storage system.
- Folder number — The folder or binder number.
All fields are optional. You can skip this when archiving and fill it in later, or edit it at any time by clicking the pencil icon on the Archive Sheet card on the roll's detail page.
Expiry date tracking
An expiry date is required when creating a film roll. GrainLab shows a warning badge on any roll that is past its expiry date so you can factor that into your development decisions.
Searching and filtering
The Film Rolls page shows stage tabs across the top (All, Fresh, Loaded, Ready, Developed, Archived). Click a tab to filter. There's also a search bar for filtering by name.
Color or black-and-white
When creating a film roll, a Color checkbox lets you mark the stock as color or black-and-white. It defaults to color — uncheck it for B&W film.
Default storage location
If you mark a location as the default for film rolls (in the location's settings), new film rolls will automatically pre-select that location. You can change it before saving. This is useful if most of your fresh rolls live in the same spot, like a fridge or a drawer.
Ruined rolls
Sometimes a roll doesn't make it — a light leak, wrong chemistry, or a camera malfunction. You can mark any roll as Ruined using the button at the bottom of the stage tracker on the roll's detail page.
Marking a roll as ruined:
- Removes it from the All tab and all other stage tabs (so it stops cluttering your list).
- Hides it from the location tree and the photo upload film selector.
- Frees the camera if the roll was loaded.
A dedicated Ruined tab on the Film Rolls page lets you see all your ruined rolls at any time.
If you marked a roll as ruined by mistake, open it and click Restore Roll — this resets it back to the Fresh stage so you can continue tracking it normally.
Printing and labels
On a film roll's detail page, the Print button (top right) opens a menu with three options:
Download label
Labels are PNG images designed for use with a label printer. The following formats are available:
- Landscape (QR on left) — A wide label (~30 × 14 mm at 300 DPI) with a QR code on the left and the roll's details (brand, stock, ISO, color type, frame count, expiry date, and name) on the right.
- QR code only — A square 400 × 400 px image with just the QR code, for use in custom label designs.
- Expired — A bold red label with white "EXPIRED" text, for marking rolls that are past their expiry date. This option only appears in the menu if the roll's expiry date has passed.
Scanning the QR code with a phone opens the roll's detail page directly in GrainLab.
Export to PDF
Selecting Export to PDF opens your browser's print dialog. The resulting PDF contains a summary detail view of your film roll and all recorded metadata for archiving. Use Save as PDF in your browser's print dialog to save the file.
Contact sheet
When a roll reaches the Archived stage, a Contact Sheet card appears on its detail page. You can upload a scan of your contact sheet (the proof sheet showing all frames on the roll) by clicking the upload area or dragging an image onto it.
Once uploaded:
- The image is displayed on the roll's detail page.
- Click the image to open it in a full-screen viewer where you can scroll to zoom in and drag to pan. Double-click to reset the zoom.
- Use the Delete button to remove the contact sheet if you want to replace it or clear it.
This is a useful place to keep a visual overview of everything on the roll alongside its development details and individual scans.
Photos & Scans
Uploading photos
Click Upload Photo on the Photos page to open the upload form. Select a file by clicking the drop zone or dragging and dropping an image onto it (JPEG, PNG, WebP, and most other image formats are all supported). GrainLab converts everything to WebP internally and generates two smaller thumbnails alongside the full-resolution version.
Filling in metadata
Title and Description are required — the form won't submit without them. Everything else is optional:
- Aperture — e.g.
2.8orf/2.8. - Shutter speed — e.g.
1/500or1s. - ISO — The film speed used.
- Focal length — In millimetres.
- Tags — Free-form keywords. Type a tag and press Enter or comma to add it.
Linking to gear and film
In the upload form you can link a photo to:
- Film roll — Selecting a roll associates the photo with that roll's detail page.
- Camera — The body it was shot on.
- Lens — The optic used.
Linked photos show up on the gear item's detail page, making it easy to evaluate a specific camera or lens over time.
Filtering photos
On the Photos page you can filter by:
- Tag — Click any tag to show only photos with that tag.
- Camera — Show only photos linked to a specific camera body.
- Lens — Show only photos linked to a specific lens.
The lightbox
Click any photo to open it in the lightbox. You'll see the full-size image alongside a metadata panel showing camera settings, gear links, tags, and file information (dimensions and file size). From the lightbox you can also edit the photo's details or delete it.
Projects
A project is a curated series of photos grouped around a theme, concept, or goal. Use projects to plan a shoot before you even load a roll and track your progress through four stages.
Creating a project
Go to Projects in the sidebar and click New Project. Give your project a title — this is the only required field. You can also add:
- Description — A short sentence about what the project is
- Planning notes — Your free-form concept, mood board ideas, gear plan, or inspirations
- Target photos — The number of keepers you're aiming for (e.g. 20 for a zine spread)
- Deadline — An optional date to keep yourself accountable
Stage tracker
Every project moves through four stages:
| Stage | Meaning |
|---|---|
| Planning | You're defining the concept — no shutter clicks yet |
| Shooting | You're actively out making photos for this project |
| Editing | The shooting is done; you're selecting and processing |
| Complete | The project is finished and ready to show |
Click any stage in the tracker on the project page to jump to it. You can move freely in any direction — there are no locked transitions. The date you first reach each stage is recorded automatically.
Adding photos
On a project's page, click Add Photos to open a photo selector. It shows all the photos in your library that haven't been added to this project yet. Select as many as you like and click Add.
Photos are shown in a grid on the project page. Each one can be:
- Removed from the project (without deleting the original photo)
- Set as the cover photo — the image used as the project thumbnail in the projects list
Equipment / packing list
The Equipment tab on a project page is a packing list built from your existing equipment inventory. Use it to plan what you'll bring for the shoot.
Select an item from the dropdown and click Add to put it on the list. Items are grouped by type (Cameras, Lenses, Film Rolls, Chemicals, Other). To remove an item, hover over it and click the trash icon.
While you're packing, click the checkbox next to each item to tick it off. Checked items get a strikethrough and the counter at the bottom tracks your progress ("3 / 7 packed"). The checked state is not saved — it resets when you leave the page, so it's designed to be used in the moment while you're physically packing.
Shot locations
The Locations tab lets you plan exactly where you're going to shoot. Add as many locations as you need — each one gets its own tab.
For each location you can record:
Where it is
- Address — A street address. GrainLab turns this into a Google Maps link.
- Coordinates — Latitude and longitude for precise pinning. If both are set, these are used for the map link instead of the address.
Access
- Permit required — Flag locations that need a shooting permit. A warning icon appears on the tab so it's easy to spot.
- Opening hours — Useful for restricted-access sites.
- Parking notes and Access notes — Free-text fields for getting there and getting in.
Lighting
- Best time of day — Select one or more options: Golden Hour (AM/PM), Blue Hour (AM/PM), Midday, Overcast, or Any.
- Orientation — The compass direction the subject faces, for working out where the light will be.
- Weather notes — Ideal conditions or anything weather-dependent worth remembering.
Links — Add any number of labelled URLs (e.g. a Flickr scouting page, a permit application form, or a map link).
Reference photos — Upload scouting photos of the location. They're shown in a grid and can be opened in a lightbox. Save the location first, then use the upload button that appears.
Notes — A full rich-text editor for anything else you want to capture about this location.
Ordering photos
Drag-and-drop or use the left/right arrows in the photo thumbnail grid in the sidebar to set the order photos appear in. The order is saved automatically and controls how photos are sequenced in the Story view.
Tips
- Use Planning notes as a living document — update it as your vision evolves
- Set a deadline if you tend to leave projects open-ended; GrainLab will flag it amber (within 7 days) or red (past due)
- You can add the same photo to multiple projects — great for cross-cutting series or retrospectives
Storage Locations
What locations are
Locations in GrainLab represent the physical places where your gear and film rolls live. They form a nestable hierarchy, so you can model real-world structure like:
Camera Bag
  └── Front pocket
  └── Main compartment
Shelf
  └── Top shelf
  └── Bottom shelf
Fridge
This lets you find things quickly — especially when you have a lot of gear spread across multiple bags or storage spots.
Creating a root location
Go to the Locations page and click Add Location. Give it a name (e.g. "Camera Bag") and an optional note. Leave the parent field empty to create a root-level location.
You can also check Set as default for new film rolls to make this location automatically pre-selected whenever you create a new film roll. Only one location can hold this default at a time.
Adding sub-locations
To add a nested location, either:
- Click the Add sub-location button that appears when you hover over an existing location in the tree, or
- Create a new location and select the parent from the dropdown.
You can nest as many levels deep as you like.
Assigning gear and film rolls
When adding or editing a gear item or film roll, you can select a location from the dropdown. The item then appears in the location tree under that node, making it easy to see everything stored in a given spot.
Searching
The search bar on the Locations page filters by gear name — it shows you which locations contain gear that matches your query. This is useful when you can't remember where you put a specific camera or lens.
Deleting a location
When you delete a location, any sub-locations it contains are promoted to root level (they are not deleted). Gear and film rolls assigned to the deleted location will lose their location assignment.
Account & Settings
Editing your profile
Go to Settings to:
- Upload or change your avatar
- Edit your display name and bio
- Set up two-factor authentication (TOTP) for extra account security
- Set your language (English or Dutch) and preferred temperature unit (°C or °F) for development logging
- Change your email or password (in the Warning Zone section)
- Delete your account permanently (in the Danger Zone section — this removes all your data and cannot be undone)
Your handle (username) is set at registration and cannot be changed.
Reporting
Reporting bugs and suggestions
If something isn't working as expected, or you have an idea you'd like to share, use the Report a Bug page (accessible from the sidebar or mobile menu).
Choosing a type
At the top of the form you choose what you are submitting:
- Bug report — Something is broken or behaving unexpectedly. This is pre-selected by default.
- Suggestion — An idea or improvement you'd like to see in GrainLab.
The form adjusts based on your choice: bug reports include extra fields for steps to reproduce and expected behaviour, while suggestion forms focus on describing your idea.
Filling in the form
| Field | Required | Notes |
|---|---|---|
| Type | Yes | Bug report or Suggestion |
| Area | Yes | The part of the app the report relates to |
| Title | Yes | A short summary |
| Description | Yes | What happened (bugs) or what you'd like to see (suggestions) |
| Steps to reproduce | No | Bug reports only — numbered steps that lead to the issue |
| Expected behaviour | No | Bug reports only — what you expected to happen instead |
| Screenshots | No | Up to 4 images; useful for both bugs and suggestions |
Once submitted you will see a confirmation screen. You can then submit another report or return to the dashboard.